Boohoo

Monday, 29 August 2016

Nails on Fleek - Jamberry

Hey peeps!

So you all have probably heard and seen a lot of buzz around Jamberry. Well me being my usual 2000 and late self, I have only very recently heard of them. I am not the best at painting my nails, most of the time I just don't even bother, so with I saw them on my Facebook news-feed I decided to give them a try. I am a complete novice with this sort of thing. Who better to try them but a beginner right?

For those of you who have no idea what I am talking about Jamberry is a brand which produces nail wrap kits. They have a catalogue which you can choose the styles you would like. You can go for simple, gradient, patterned, or you could choose a few different styles to have a varied look.

So I have given them a try. Well when I said I did, I meant my sister. I realised that I am not in the slightest bit ambidextrous so couldn't even think of a way to put these on my right hand. So I made my new mum of a little sister try them on for size.

Here are my thoughts:


I decided to try the 'Damsel in Distress' set. In the package you get the wraps, instructions, wooden and rubber tools, a file and nail prep wipes. Pretty much everything you would need (except a hair dryer, you need one to soften the sticky back and to bond them to your nails).There are 10 sizes of wrap in each kit and some are big enough to use for your toe nails.

Application: 

Application is pretty simple as long as you follow the instructions. You basically just prepare your nails as you would do if you were about to polish them with regular polish. The only difference is you need to use the nail prep wipes to make sue they are really clean. You then follow the instructions to apply the wraps and your done.

When I placed the first one on my sister, I am pretty sure it took me about 15 minutes to make sure it was on right and stuck. it is important to use the hair dryer and smooth the wrap once you apply it to make sure it sticks will.

I found that when I rushed it (mainly when my nephew started crying) the wrap started to come away from the cuticles. When i took my time, it was absolutely fine.

I did find them pretty fiddly to apply, purely because I was conscious of making sure they were on straight and looked good.

Overall the application was pretty simple and the instructions were a god send.

The look:

I have to say these particular ones were gorgeous. It looks pretty much like shellac once applied as its a little thick but still natural. I made the mistake of putting them too close to the cuticle so it took a lot of effort to make sure they were smoothed properly.

I would choose this particular pattern for an accent nail.

Staying power:

They started to peel a little after a few fours, but i thin that was more to do with the rush job i made than the wraps themselves. I fixed it by using the hair dryer and smoothing around the cuticles again.
After fixing them, they lasted a good couple of days. I have to say that these were days filled with nappy changes, washing dishes and general mum's life antics. These have been considerably put through the ringer. Unfortunately they only really lasted a couple of days, but to be fair they are probably not meant for such rigorous use of hands.

Now if your're like me and live a much simpler life, they will more than likely last you a good week.

Removal:

Removing them was pretty simple. It was just a matter of using the wooden tool, finding an opening and easing off the wrap from the finger. Much more simple than polish remover.

So overall I have to say that I am pretty impressed with these wraps. So much so I will be getting some for the British plus size awards. I really want to try them on my toes, maybe even have an accent nail for my big toe.


I am so skeptical when it comes to these, but have to say I am pretty impressed. They are probably not the most practical when you are a mum, or even someone who has a tendency to pick their polish. My sister found that after a while the parts that lifted caught on her sons hair and clothing (hence the short wear time for a mum), but for us who don't have children to pick p or run after, they are great.

Now if you would like to purchase some, just head over to http://carolinegosling.jamberry.com to check out the huge range. Also show Caroline some love and like her Facebook page https://www.facebook.com/CarolinesJamberrys/?fref=ts

You can get a 10% discount just by say I sent you! Be sure to mention my blog name to get it.

They are definitely worth a try, just because they are so pretty and easy to use. Just make sure you have enough time to do it and pay attention!

Be sure to comment below if you have got them and tag me in pics of them (use my name on Google+ Instagram, twitter and Facebook). Can't wait to see them!

Until next time xx


Sunday, 17 July 2016

Ghana Braids - New Protective Style!

Hey peeps,

So the weather has finally caught up with the seasons and here in the UK we are officially in Summer!! With a new season there's a new protective style. No weave, no wigs, this time I have gone for Ghana Braids.

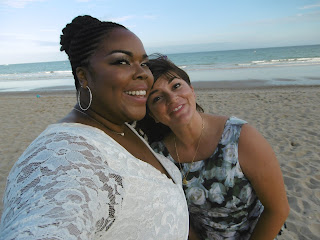
I recently went to a beach wedding and wanted to protect my hair from the elements whilst also looking simple and chic. I decided to head to my trusted stylist at Revelation hair and beauty. The Ghana braids were the winner.


straight outta the salon


Just a simple updo using an alternative cornrow style. I love them. Ghana braids are simply cornrows but with hair added as you braid. This gives the illusion of the braid getting bigger and gives simple cornrows an alternative style.

I can be a real basic bee so I gave Sally free reign on the colour of the hair used. I'm glad I did as she gave me this gorgeous purple and black look. The style took less than 3 hours to complete and I ended up with a very trendy but sophisticated style. I have to say that I am completely in lobe with these. They matched perfectly with my outfit (will be letting you know more about that later).

Simple but so effective! I thoroughly recommend these if you are looking for an easy to maintain and elegant style.

When I wake u each morning, all I have to do is put the braid in a bun and go! I love the fact that I get an extra 20 mins in bed!

beach wedding look!


If you would like to try these out, be sure to head over to Sally at Revelation Hair and Beauty in Ipswich and book an appointment! She is so talented and can do a crazy amount of styles. She is pretty much responsible for every protective style I have tried out!

Check out their website but clicking HERE!

Until next time xx

Sunday, 3 July 2016

Sleek Hightlighing Pallette - Review

Hey Peeps,

So today I decided to share with you my thoughts on the new Sleek highlighting palette. AS you know summer has most certainly kicked in, and this means it is time for the glowy, sun-kissed summer look!
I have been on a search to find some great products for this season and this is the first of my many finds.
So I randomly came across this palette on Amazon when I was look for highlighters and shimmer bronzers. I have the Sleek Contour and highlighting palette, but was oblivious to the fact that they have a highlighting palette.

It is always a gamble to buy something online when you haven’t seen or heard of it before, but judging by the pictures I decided to take a chance. 

This my people is the Sleek highlighting palette. I later saw Manny MUA and Jeffree Star rave about this in their videos, so i'm pretty glad I bought it!

So what this palette all about?

This Palette gives you four shimmer shades to produce a super sun-kissed dewy look. The colours stem from a very bright white shimmer, cream to a deeper shimmer powder. But before I go into that I have to tell you about the packaging.


This shimmer is perfect for a beginner as the out packaging/ box has a 4 step guide to use the highlighters and achieve the perfect look. Now If you are a little more seasoned and practices, you will know that you will probably have to adapt it to suit your skin tone. 

I bought the 'Precious Metals' palette as the majority of the shades are usable for my dark skin tone.

So what does the palette actually look like?

This particular palette consists of 4 shades; Antique Bronze, Platinum, Royal and Renaissance Gold. Each of these are beautiful. They have a gorgeous shimmer, without looking too metallic or glittery. antique Bronze is the powder highlighter in the palette, as the remaining shades are cream highlighters. They are still very much wearable over powder.

I love the fact that you can use all the colours within the palette to create a gorgeous strobe look. As I am dark skin, I decided to steer clear of the Platinum shade as it tends to make my skin look a little ashy, but if you're a little more daring than me, you could use this as an inner corner highlight for your eyes or even pop it on top of a matte lip to ad some sheen.

The cream shades have a really buttery consistency, which make application so easy. I found that using my fingers gave me the best distribution for my nose and eyes. A simple fan or tapered brush applies the bronze perfectly. It is so pigmented a little goes a long way.

This was definitely my go to palette for my holiday and gave me a gorgeous natural look with a healthy glow. This palette can be used perfectly between day and night looks and the colour lasts for a crazy long time.

For this look I used royal and renaissance gold for my brow, nose, eye and cupids bow highlight then Antique bronze for my cheeks.
I used this to give myself a naturally sun-kissed look.

For my Friday brunch look I decided to use the light colours only to give myself a more powerful glow.
I was very impressed with the versatility.

I am confidence this palette can be used on a wide range of skin tones, just switch up the way you use them and it will work perfectly!

I adore the packaging too. I love the fact that the palette is in a mirror look case. You can see yourself in any part of the palette and it as a mirror for when you need to touch up.


This palette is a lot different to any other affordable highlight palette. It is so rare to find something that can transition so well to such a range of skin tones.

So if you are looking for a palette to start your highlighting story, try this one. I have never seen a highlight palette with instructions.


 Try it out. Let me know what you think in the comments. I'm pretty sure you won't be disappointed!

Until next time

(want one? click here!)


Sunday, 19 June 2016

Sand Pits and Sheer Dresses - Scarlett and Jo OOTD

Hey peeps!

So I am fresh outta the sandpit (aka Dubai). Its one of my favorite places in the world.It's clean, warm (well really really hot actually) and just mind blowing.
went there for a few days to participate in crazy hen party activities, but I couldn't pass up the opportunity to share with you my favourite outfit of the weekend (well not including the cop costume we wore for brunch day).

The first night saw me in a very sophisticated bar called 'Observatory' in a skyscraper. The altitude will make you understand why it is called this. It was only fitting I took my recent 'Scarlett and Jo' purchase a test run.So I wore their very chic 'Maxi Duster shirt'.


This number is just stunning and is by far my favourite piece in the collection and I have to admit that I wanted all 3 colours. It comes in Black (as per the pic), navy and ivory. I tried to get the navy and ivory but unfortunately it was sold out, so I could only get the navy.

This number can been worn as a sassy addition to a smart casual look. If you are into the wow factor I would totally recommend going daring with some high waisted shorts and a signature bra. I went with the more conservative look ( I mean  I was in Dubai, so the risque look would not go down very well!). I paired this with some Scarlett and Jo leggings and a simple black vest.

Even though I was in the sandpit where with temp in the evening was still over 30 degrees, I still felt really comfortable. The material is very forgiving and cooling. Although you are completely covered up, you can still benefit from the breeze. I decided to keep it a little sassy and only have it closed by 2 buttons. When walking I was able to make a statement.

There are two high splits in the front of the garment, to make it easy to walk in and dance. You wont feel constricted when you sit down or stuck in a sleeping bag.

I am very impressed with this as Scarlett and Jo normally have items which are very demure and sophisticated. This is most definitely on the edgy side. This dress was actually my inspiration for my latest protective style (let me know if you would like to find out more about this style by commenting below).


Make up wise I decided to keep it pretty simple and went with a glowy sun-kissed look. I kept the eyes simple, bronzed a little but of course I needed to go ham with the highlighter. In fact I stepped away from the makeup revolution highlighter and tried the Sleek palette (review coming soon).
It gave me the tanned look without having to bake in the sun.

I absolutely felt like a million dollars with this whole look!

So let me know what you think of this look. Comment whether it was a yay or a nay!

Who said plus size girls can't look edgy and sexy! Dress you confidence, not your size!

Until next time peeps xx

Thursday, 9 June 2016

New box on the street - The Little Known Box

Hey Peeps!

So there is a new box on the street and of course I wanted to see what it's all about! So let me introduce you to the 'Little Known Box'!

This box us very similar to other beauty boxed on the market, but it gives the chance for new brands to showcase their products. I love the fact that there is this twist on the beauty box. Don't get me wrong, I love having high end well known brands, especially the ones that aren't widely accessible in the UK, but it's so difficult for emerging brands to get out there and put their stamp on the world. I know the struggle from being a new blogger and youtuber. There is very little scope for new enthusiasts to make a name for themselves! So come through little known box, come through!!

So what did the first box have to offer??? 

The box itself is pretty simple. Just a very sleek black box with golden lettering. I'm not made at the simplicity of it. It may not be as extravagant looking as other established boxes out there, but I would much rather the money is spent on the products rather than the packaging. 

Inside you have the same sort of simple theme running through. I have to say that this is pretty genuis. It maybe simple, but the use of black and gold makes it feel extravagant!

So let's get to talking products! 

You get 5 products in this box and each of them are full sized. Like the other boxes on the market, they are a mixture of skin care and and make up products. 

Product 1: Flint and Flint Moisturiser

Flint and Flint is a UK based brand and has included their face cream int his box. I am pretty impressed with the size of this as its RRP is £42. I would have never expected a full size product of this value to be included.  A little goes a long way with this product, but I'm not convinced that it is the best if you have naturally dry skin. I have very oily so I would have to use this very sparingly. It stated it's suitable for all skin types, but if you are dry skinned be prepared to use a good 5p sized amount (thinking of it, that's not that bad). There's no strong scent to it, which is a bonus for face products. It's not the most natural of products either. Overall I'm not mad at it!


Product 2: Dirtea Exfoliating Charcoal Scrub

This is a product I have never heard of before, or anything like it for that matter. It is a tea scrub which consists of organic products to use as a skin treatment. They have a range with 3 different teas; peppermint, coconut and diamond. I have the diamond using white tea. 

You just have to use it in the same way as other scrubs and just rub over the body in circular motions. This is a full sized sample, but if you are to buy it at the RRP of £17.31 you would get a box of 8 sachets. It contain Himalayan salt for the exfoliating effect. 

I haven't tried mine yet as I have sensitive skin. I have to be careful with the products I use and I'm not one to gamble. 

Product 3: The Vintage Cosmetics Company's Eyelash Curler 

I have needed a lash curler for the longest time, but have been brain farting in getting one, so to find this one in the box was fate. Not only that, but it is also in rose gold! 

There was not much info on the company in the leaflet with the box, but never fear, I have done some research! The company specialises in lashes, beauty tools and make up brushes for women along with men's grooming tools. 

This curler is a limited edition. What a nice little treat! It's sturdy but also lightweight and easy to use for beginners. 

Product 4: Medusa's Makeup Lip Gloss

This brand is based in the US and is edgy. They sell Vegan and Cruelty free make up.

This gloss provided is in the shade 'Bite me' (love the name). The gloss applies like butter on warm toast. It's a gloss so it isn't the most long lasting, but it is incredibly pigmented. So much so, I am sure you will get away with wearing this with lip liner only. 

I'm not the biggest fan of red lips, but I love this colour! I am very impressed there is a cruelty free and vegan brand included the the box and would love to see more of this! 

Last but not least: Thumbs up Designer Nail Wraps

You get the surprise of one of two wraps 'Ame' and 'Goldstone'. I got 'Goldstone'. The pack itself contains 20 wraps and a range of sizes. Even my massive thumbs don't need the largest size. I think they would make great toe nail wraps!


So all in all I'm impressed with this box. I think this can be a worthy contender, but I just hope they haven't played their trump card at the launch. 

I will be looking forward to the next box and seeing what they have for us then. I will be making an unboxing video of it so you can see along with me what surprises they have in store for us! 

If you would like to check out their subscription, just check out their website by clicking here.

Come through box, come through!

Peace and chicken grease!!!


Wednesday, 11 May 2016

Protective style update - My favourite products!

Hey peeps,

So it's been a hot minute since I have updated you all on my protective style journey, so I thought I would share with you my journey in finding the perfect products for having my hair under wraps!


So when I have my curls on show, I love to use Shea Moisture products. They are thick and enriched with the nutrients my hair needs. My Favourite range has to be a toss up between the original Raw Shea Butter Products or the Jamaican Black Castor Oil range. The Raw selection is just moisture, moisture, moisture. My hair is in love with this. The deep conditioner is everything. The conditioner is a great co washer and leave conditioner.


I love the Jamaican Black Castor Oil range too. I think my favourite is the shampoo, as it clarifies and cleans my hair in one use. The leave in conditioner is light but moisturising.

The only issue with these products is that I found them too heavy for my hair, whilst in protective styling. The products would build up very quickly. Trust me it is no joke!


So I thought I would try out their 10 in 1 Superfruit Renewal System. The product's consistency is a lot thinner so I thought I would give it ago to see if that would help with build up. #

Being a superfruit complex, it has a very distinctive berry smell. Oh duh right. But it is absolutely amazing.

So I decided to buy the deep conditioner and an their standard conditioner, with view to use the deep conditioner when I clarify my hair and the standard conditioner as a co wash and leave in.

So let's get on with it and review shall we (or shall I say I)


Deep Conditioner:

I am pretty impressed with this. I have to admit that I was a little apprehensive about buying it after checking out a few YouTube videos. The reviews were pretty mixed. But I am a believer in trying things for myself.

My honest opinion is also kind of mixed but I actually like the product. I loved the way it leaves my hair feeling soft, but not too heavy. Again the smell is absolutely divine. The only real issue with this is that I needed to use A LOT of product for it to work. My hair is by  no means thick. It is very light and just grows long, rather than thick. It is by no means coarse. So to have to use 1/3 of the pot for one application is crazy. I hate to imagine how much someone with thick coarse hair had to use.
My personal opinion is that there is no point in having a product which is thinner if you have to use a ton of it to get results.

I also found that I needed to keep the product on my hair for far longer than recommended. The magic number for me was 2-3 hours. That is great when you are having a lazy day and can't be bothered to rinse, not so much if you are on any kind of schedule.

I found it worked best following a clarifying shampoo, rather than prior. If you hair is feeling stripped after clarifying, don't expect to get a huge moisture injection from it. I would say that this would work really well as I standard conditioner rather than a deep conditioner.

I know I was looking for something a little lighter, but this was not what I was looking for. It's such a shame as I actually love the smell and can not get enough.


10 in 1 Conditioner:


I am absolutely in love with this product. So much so, it's now my new go to co-wash and conditioner. It is so smooth and a lot thicker than most conditioners. I kept it on whilst in the shower for about 4ish minutes and the change was crazy. My hair felt so light but soft. My curls were bouncy too.

It seemed to work so well, I thought I would try it as a deep conditioner, considering the actual deep conditioner was such a meh. I used it after clarifying and left it on for an hour and found my hair felt amazing, even after feeling a bit striped post shampoo.

Shea Moisture, should have just stuck to this and not bother about the hair masque.

So to go a little further I thought I would also try it as a leave in conditioner, using a 20p size amount and distributed it on my hair. AMAZING. That is all!

I could not be any happier with this product. SO much so I have purchased it for a second time. I have to say that it lasts quite a while. This product go far.

I found my hair stronger and lighter, and yes there smell is just a berrilicious as the masque. You can smell berries all day if you use it as a leave in.

So I wold definitely recommend this product for anyone try. I can image it would work well on Keratin or perm treated hair as it is sulphate free and uses a lot of natural products.

If you would like to try these products, you can find them in any afro hair product stockist or you can by it on Amazon , direct from them, anyway you want really.

So let me know if you have ever tried this out and what you think of it. Just leave a comment!

Until next time x


Monday, 2 May 2016

Pageant Make Up Look - The Products

Hey Peeps!

So I have made an epic length video uploaded to my channel Big Healthy Tracey Channel showing you how I do my Pageant Makeup look. I used mostly affordable products  to show you that you can create looks without having to pay a lot of money.

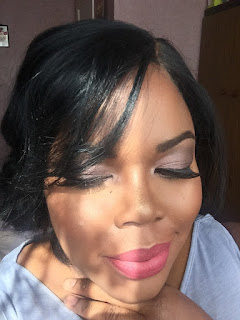
So this is the look I created:
Here is what I used to create this look!


BROWS:
Collection Brow kit: You can get it from Amazon,Collection Eyebrow Kit or from any Collection counter in Supermarkets and drug stores.

PRIME:

Maybelline baby skin: This primer is amazing at reducing pores and giving you an even base. I got mine from the Maybelline section in Superdrug, but you can also get it from Amazon Maybelline New York Baby…

George Face Primer: Just the standard face primer is amazing at keeping your makeup in place for long periods. You can just get it from any ASDA counter.

Urban Decay Priming Spray: This is refreshing and hydrating. I highly recommend this is your skin is a little dry. I use this on the perimeter of my face to help add some glow. Any Urban Decay counter has this or if like me you are lazy, you guessed it, Amazon has it! URBAN DECAY B6 Vitamin…

Benefit Stay don't Stray Eye primer: I bought mine from the benefit counter, but you can get it online directly from benefit direct from benefit or again from Amazon  Benefit Cosmetics…

FACE:
La Girl Pro Conceal Concealers: from amazon. You can get every colour imaginable, including the colour correcting colours. My highlight Colour is Fawn and Contour Colour is Dark Cocoa LA Girl Cosmetics Pro…

Benefit Dr Feelgood: Benefit Dr. Feelgood (24g) you can buy it from Amazon, or buy this directly from benefit Dr Feelgood direct from Benefit.

Elf Tinted Moisturiser: I bought mine from amazon because there is nowhere near where I live which sells Elf products: e.l.f. Studio Tinted… just find your shade.

Maybelline Dream Fresh BB Cream: I love this combined with Elf. It gives a gorgeous dewy look. My shade is nowhere to be found so I have to buy online. You guessed again, I love me some Amazon! Maybelline New York Dream…

High Lights: Its a dupe for Benefit's High Beam. I love High Beam. It's amazing for a sun kissed Glow, but High Lights is a great and more affordable substitute. Again I have only seen it on Amazon.Technic Highlighter

Ben Nye Banana Powder: Ben Nye's loose powders are wonderful setting powders and even better for baking. i use banana as my highlighting powder, but they have many different colours for very fair to very dark skin. Again Amazon is wear I get mine. I buy the whole tub, but you can also get sample sizes to make it more affordable. New - BEN NYE BANANA…

Sunkissed Bronzer: I use Dark of course, but again there are other shades. Sunkissed Giant Bronzer Dark…

Technics Mega Bronze: I love this to warm up my face, and to contour my nose. It is my go to bronzer, although I do love Hoola by Benefit too.Technic Mega Bronze…

Collection Speed Highlighter stick: gives a champagne gold glow without powder. I got this from Glossy box and fell in love!Collection Speedy…

Makeup Revolution Highlighter: This is by far my favourite powder highlighter. I have tried others, but nothing compares.MAKEUP REVOLUTION…

Gia Blush: Unfortunately I received this in a good being box, and can not find it anywhere else. Check out their boxes Good-being Box

EYES:

Transition colour: Sorry guys, I found this one on Ebay a while back from a nameless brand. I have not been able to find any colour like it, but it make the perfect transition colour for me. I suggest you find the right transition colour for you. I like Laroc and Morphe palettes as they have a wide range of shades.

W7 In the Nude: I more affordable version of Urban Decay's Naked 3 Palette. I have to admit the Naked 3 Palette is a lot easier to work with as it is far more pigmented, but W7 is pretty good for it's price. I just find you need to build the colour on your lids. The fall out is no joke either.W7 - 'IN THE NUDE' EYE…

Kohl Pencil: This is from Collection. again you can get it in supermarkets etc but also again on Amazon Collection Intense Colour…

Maybelline Falsies Mascara: I love this Mascara nearly as much as my Givenchy. Maybelline The Falsies Volum'…

Givenchy Mascara: I got this in April's Birchbox and thought I would try it out on this video. It is just amazing! Check out Birchbox for their monthly Subscription box. You get amazing high end products in Full and sample sizes, but not the high end prices. You can use my customer code to get birch box points. https://www.birchbox.co.uk/invite/bighealthytracey

Yanqina Waterproof Liquid Liner pen: Any liquid liner pen is good in my books. I find with this one that the tip is so thin, you can have amazing precision even if your wing liner skills are developing.Zotop YANQINA Waterproof…

Lashes: I am not are where they came from but I got them in a goody bag, when I went to Dubai Fashion week. I thought I would try them for this video.

LIPS:

I used 2 lip liners one of which was Rimmel Exaggerate… and the other was a random one I found on Ebay. I can't even see the name. I love using liners to create customer colours combined with lipsticks. I find with my large lips and dark skin, it gives me the freedom of wearing bold colours, without looking like a walking pair of lips.

Teeez Oasis Lipstick Killing me Softly: I got this from my February Glossybox but have also found several colours on Amazon. It is really smooth and hydrating. The colour is bold and it is highly pigmented.Teeez Read My Lips Lipstick -…

SET THE MUG:

My go to setting spray is Urban Decay All Nighter. Your make up will never move. I have not found a cheaper version that works even a fraction like this.All nighter long-lasting…

So that is it. The long list of products I used for this make up look. Again this is a pageant make up look , so I had to go a little crazy and make sure I applied plenty of product.

This is my affordable (mostly) range, to show you that you can achieve the same flawless look without having to take out a mortgage.

If you would like me to do a high end version, be sure to like and comment on my video.

Let me know how you like the look.

DISCLAIMER: The Amazon links are affiliate ones, but it is also where I purchased the items (unless I stated otherwise). Clicking the link will not mean you are charged anymore. It is purely a link in which I can earn from the referrals. Where I can I have also given you another option which you can use if you do not want to use the links.

Be sure to show me your looks by Following me on instagram Big Healthy Tracey and using the hashtag #perfectlyflawed #BHTmakeuplook.

Can't wait to see your creations!

Until next time peeps xxx